
Collaborative Realtime Clicker with Server-Side Rendering
This article is a short introduction to some of TrailBase more advanced features, specifically server-side rendering with a popular JS framework (React, Vue, Svelte, Solid) and realtime subscriptions to data changes.
We’ll built a simple clicker game, where players can increment a globally shared counter by click a button and updates are automatically send out to all participants.
The conclusion of this tutorial is checked into the repository and can be found here or downloaded by running:
$ git clone https://github.com/trailbaseio/trailbase$ cd trailbase/examples/collab-clicker-ssrCreating an SSR Template Project
Section titled “Creating an SSR Template Project”We start by setting up a server-side rendered (SSR) application that will
ultimately render in TrailBase’s JS/TS runtime.
Because it’s JavaScript there’s no single way to set up a new project, there’s
a million good ones and a few more questionable ones 😅.
For this tutorial we’ll use vite, which has gained notable traction and
provides templates for most popular frameworks. As for frameworks, we’ll use
Solid but the same approach applies to React, Vue, Svelte, Preact, … .
Let’s run:
pnpm create vite@latest <project-name>which will bring up a CLI assistant. Navigate through: Others > create-vite-extra > ssr-solid > TypeScript. If you feel adventures, you can select any of the
other SSR options (React, Svelte, …) or go with JavaScript instead.
With the project template created, we can simply follow the on-screen instructions:
cd <project-name>pnpm installpnpm run devThe final command, will start an express.js
development server run by Node.js as defined by <project-name>/server.js.
Opening the
server.js implementation,
slightly simplified it looks something like:
async function handler(req, res) {    const render = (await import('./dist/server/entry-server.js')).render;
    // 1. Call render function.    const rendered = await render(req.url);
    // 2. Build HTML template.    const html = templateHtml      .replace(`<!--app-head-->`, generateHydrationScript())      .replace(`<!--app-html-->`, rendered.html);
    res.status(200).set({ 'Content-Type': 'text/html' }).send(html)}
The details are not super important and framework-dependent but in simple terms:
- The server first loads and executes a render function defined in
dist/server/entry-server.js. - Then slices up the
<project-name>/server.jsHTML template and inserts two parts:- a serialized “hydration” script in the header,
- and the output of the above render function as the document body.
With this express.js server setup and the actual rendering delegated to the respective JS framework, this is really all there is to SSR. In other words, our TrailBase JS/TS setup will simply need to execute the render function, then build and serve the HTML template.
Before we start plumbing, it might be worth taking a quick look at the
directory structure: src/ is where our application code lives, which will be built
into the final artifacts under dist/ by pnpm build.
For example, the render function is defined in src/entry-server.tsx and will
be compiled into /dist/server/entry-server.js.
Besides the dist/server artifacts, there are dist/client artifacts
containing the HTML, CSS and JS intended for the user’s browser.
We can serve these simply using trail run --public-dir=<client-artifacts-path>.
Implementing the SSR Handler
Section titled “Implementing the SSR Handler”As discussed above, we ultimately want to execute something akin to:
import { render } from "dist/server/entry-server.js";const htmlBody : string = render(/*...*/);to put the body along some hydration script into our
<project-name>/index.html template.
Let first address a minor obstacle. Running pnpm build and looking at the
dist/server/entry-server.js artifact we can see that the code is non-hermetic
depending on framework modules.
In order to make our lives easier, let’s inline everything by changing
vite.config.ts to:
export default defineConfig({ plugins: [solid({ ssr: true })], ssr: { noExternal: true, },})Running pnpm build again, we have a standalone renderer without external
dependencies 👍.
Building a minimal SSR App
Section titled “Building a minimal SSR App”We can now start implementing the actual HTTP handler as a WASM component,
which can be run by TrailBase.
It’s probably easiest to copy an existing WASM component, e.g.
/examples/wasm-guest-ts.1
Stripping out all the example code, and reproducing the above behavior we end up with something like:
import { defineConfig } from "trailbase-wasm";import { HttpHandler, HttpRequest } from "trailbase-wasm/http";import { readFileSync } from "trailbase-wasm/fs";
// IMPORTANT: update to point to your `<project-name>/dist`// This assumes that the WASM guest lives in://   <project-name>/guests/typescript/import { render } from "../../../dist/server/entry-server.js";
async function ssr(req: HttpRequest): Promise<string> {  // 1. Call render function.  const rendered = render(req.url());
  // 2. Build HTML template.  const template = new TextDecoder().decode(    readFileSync("/dist/client/index.html"));
  const html = template    .replace(`<!--app-head-->`, rendered.head ?? "")    .replace(`<!--app-html-->`, rendered.html ?? "");
  return html;}
export default defineConfig({  httpHandlers: [HttpHandler.get("/", ssr)],});
Voila! Last thing, if you copied the WASM guest template to it’s own location,
make sure that the trailbase-wasm dependency isn’t a workspace dependency but
references the latest upstream
package.
Afterwards, you should be able to run pnpm build to build a
dist/component.wasm.
After placing this component into your <project-name>/traildepot/wasm and
starting with:
cd <project_name>trail --data-dir=traildepot run --public-dir=dist/client, we have a simple SSR app running with TrailBase 🎉.
Building the Clicker App
Section titled “Building the Clicker App”If SSR is what you’re after, the tutorial could end here. If you have a few more minutes, let’s build something a little more fun: a clicker app to collaborative increment a globally shared counter 🤣.
For this we need a few foundational pieces:
- Create a table with a single record holding the current global counter value.
- A way to forward the counter state from the initial server-side render to the client in a structured manner so we can continue to increment it2.
- An API to increment the counter.
- Add the actual button and a subscription to get notified whenever someone else increments the counter.
The following sections will cover the major beats but skip over some incrementally evolving glue code to avoid being overly redundant. Hopefully you can work things out with a little help from the compiler. If not, you can find the final product here to read along or after finishing the tutorial.
1. Setting up the Database
Section titled “1. Setting up the Database”Using TrailBase’s migrations, we can simply add a migration file that will create the schema and the counter entry:
CREATE TABLE IF NOT EXISTS counter (  id           INTEGER PRIMARY KEY,  value        INTEGER NOT NULL DEFAULT 0) STRICT;
INSERT INTO counter (id, value) VALUES (1, 5);
Note, if you’re working with a preexisting TrailBase setup, the timestamp in the file name needs to be larger than your most recent migration.
2. Forwarding Server State
Section titled “2. Forwarding Server State”We’ll simply serialize our state to JSON and inject it as a simple JS script into the HTML document next to the hydration script.
export function render(_url: string, count: number) {  const data = { count } satisfies Clicked;
  return {    html: renderToString(() => <App initialCount={count} />),    // Script to set __INITIAL_DATA__ state object on the client from    // serialized server state.    data: `<script>window.__INITIAL_DATA__ = ${JSON.stringify(data)};</script>`,  };}
Afterwards we can update the client’s entry-point to read the state object and inject it into the JS app using the appropriate mechanism for your framework choice:
hydrate( () => { const initialData = window.__INITIAL_DATA__; return ( // Injecting state into the Solid component. <App initialCount={initialData?.count ?? 0} /> ); }, document.getElementById('root') as HTMLElement,)We also need to update the handler code to query the current count and wire it into the server-side render function above:
import { query } from "trailbase-wasm/db";
async function ssr(req: HttpRequest): Promise<string> {  const rows = await query(      "SELECT value FROM counter WHERE id = 1", []);
  const count = rows.length > 0 ? (rows[0][0] as number) : 0;  const rendered = render(req.url(), count);
  const html = readTemplate()    .replace(`<!--app-head-->`, rendered.head ?? "")    .replace(`<!--app-html-->`, rendered.html ?? "")    .replace(`<!--app-data-->`, rendered.data ?? "");
  return html;}
3. Counter Increment API
Section titled “3. Counter Increment API”We could use record APIs and first read the current value and subsequently
write value+1, however this would lead to data races potentially loosing
concurrent updates and under-counting.
Instead we want an atomic database update. For this we create a new TS endpoint
in traildepot/scripts/main.ts:
import { query } from "trailbase-wasm/db";
async function clicked(_req: HttpRequest): Promise<string> {  const rows = await query(    "UPDATE counter SET value = value + 1 WHERE id = 1 RETURNING value",    [],  );
  const count = rows.length > 0 ? (rows[0][0] as number) : -1;  return JSON.stringify({ count });}
export default defineConfig({  httpHandlers: [    HttpHandler.get("/clicked", clicked),    HttpHandler.get("/", ssr),  ],});
We’ll see in the following paragraph how this endpoint can be called from
src/App.tsx.
4. UI & Record Subscription
Section titled “4. UI & Record Subscription”We simply need to expose the counter table through a world-readable record
API (using the admin UI or config file):
# schema-file: <repo>/crates/core/proto/config.protorecord_apis: [ # ... { name: "counter" table_name: "counter" acl_world: [READ] }]Afterwards we can build the UI and use the trailbase client library to
subscribe as follows:
export function App({ initialCount }: { initialCount?: number }) { const [count, setCount] = createSignal(initialCount ?? 0)
const onClick = () => { setCount((count) => count + 1);
fetch("/clicked").then(async (response) => { const clicked = (await response.json()) as Clicked; if (clicked.count > count()) { setCount(clicked.count); } }); };
onMount(async () => { const client = new trailbase.Client(window.location.origin); const api = client.records("counter");
const reader = (await api.subscribe(/*counter_id=*/1)).getReader();
while (true) { const { done, value } = await reader.read(); if (done) { break; }
const update = value as { Update?: { value?: number } }; const updatedCount = update.Update?.value; if (updatedCount && updatedCount > count()) { setCount(updatedCount); } } });
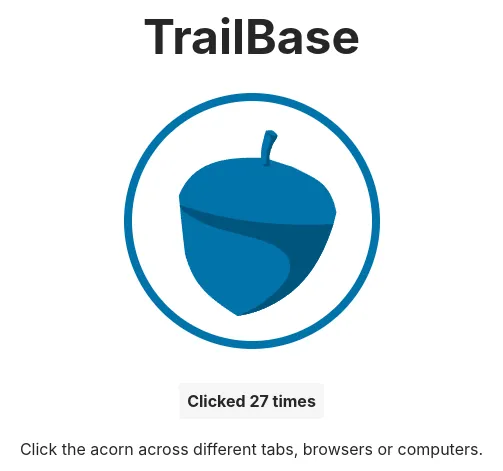
return ( <div class="flex flex-col gap-4 text-neutral-800"> <div> <button class={buttonStyle} onClick={onClick}> <img class="size-[256px] m-2" src={logo} /> </button> </div>
<button class="px-4 py-2" onClick={onClick}> <span class="p-2 bg-neutral-100 rounded font-bold"> Clicked {count()} times </span> </button> </div> )}
const buttonStyle = "p-2 rounded-full hover:bg-accent-200 hover:scale-100 active:scale-90 animate-all";Conclusion
Section titled “Conclusion”At this point you should hopefully have a little collaborative clicker game 🎉. If you got lost along the way - apologies . You can check out the final result here.
What’s Next?
Section titled “What’s Next?”Thanks for making it to the end. Beyond the basic example above, the repository contains a more involved examples, such as:
- A Blog with both, a Web and Flutter UI, more complex APIs, authorization and custom user profiles.
Any questions or suggestions? Reach out on GitHub and help us improve the docs. Thanks!
Footnotes
Section titled “Footnotes”-
For this tutorial we’re going to use the TypeScript template, however the checked-in example does also contain an implementation using Rust embedding QuickJS to execute the render function. ↩
-
We could technically parse the value out of the rendered DOM, though we’d like to be a bit more robust against future changes to the DOM. ↩